
Home Assistant automation is revolutionizing the way people interact with their living spaces. This open-source home automation platform empowers users to create a truly smart home, offering unparalleled control over various devices and systems. With its intuitive interface and powerful capabilities, Home Assistant has become a go-to solution for those looking to enhance their daily lives through technology.
This guide will walk readers through the essentials of Home Assistant automation, covering everything from initial setup to advanced integrations. It will explore how to get started with the Home Assistant software, integrate smart devices seamlessly, and build custom automation workflows. By the end, users will have a solid foundation to create scenes, set up triggers, and leverage developer tools to tailor their smart home experience to their unique needs and preferences.
Getting Started with Home Assistant Automation
Integrating Smart Devices
Home Assistant’s strength lies in its ability to integrate a wide range of smart devices, allowing users to create a unified smart home ecosystem. Home Assistant automation This section explores the various types of compatible devices, the process of adding new integrations, and how to organize devices effectively.
Compatible Device Types
Home Assistant supports an extensive array of smart devices across multiple categories. These include:
- Lighting: Smart bulbs, switches, and dimmers
- Climate Control: Thermostats, fans, and humidifiers
- Security: Cameras, doorbells, and alarm systems
- Entertainment: Media players and streaming devices
- Sensors: Motion detectors, temperature sensors, and energy monitors
- Home Appliances: Vacuums, lawn mowers, and irrigation systems
When selecting devices, it’s advisable to look for those with Zigbee, Z-Wave, HomeKit, ESPHome, or Matter compatibility for optimal integration with Home Assistant. These protocols often provide better battery life for wireless devices and more reliable local control.
Adding New Integrations Home Assistant automation
To add new devices to Home Assistant:
- Navigate to Settings > Devices & Services
- Check the “Discovered” section for any automatically detected devices
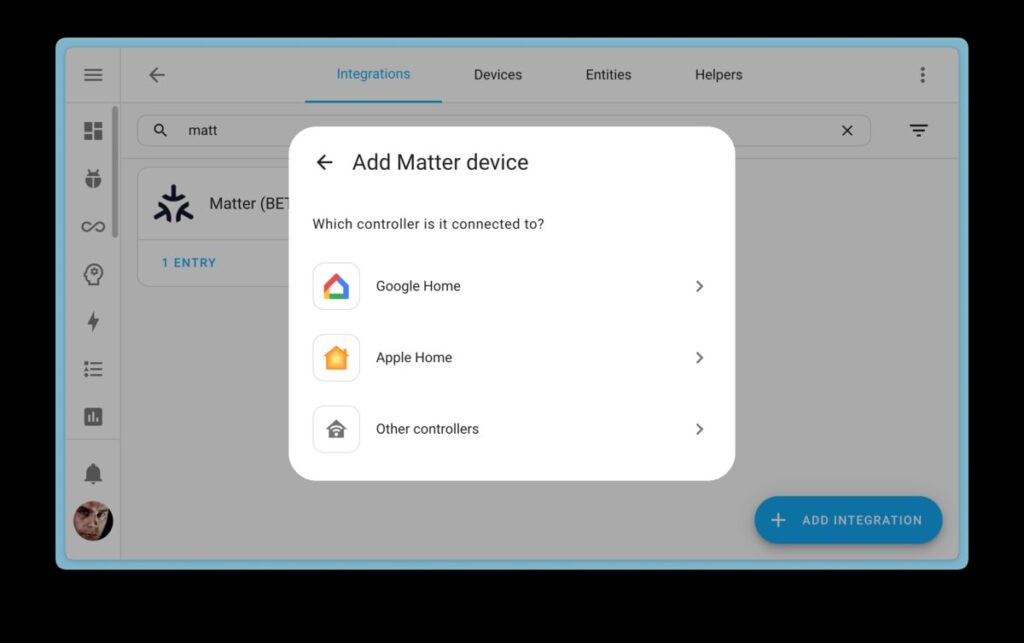
- To add a new integration manually, select “Add Integration” in the bottom-right corner
- Search for the desired integration and follow the on-screen instructions
For example, to add the Workday integration:
- Type “workd” in the search bar and select “Workday”
- Name the integration (e.g., “Workday tomorrow”) and select your country
- Configure options such as workdays, holidays, and languag
- Assign the integration to an area, if desired
After adding an integration, you can view its details, including available services and entities.
Grouping Devices by Area
- Organizing devices by area enhances the user experience and simplifies automation:
- Areas in Home Assistant represent physical spaces in your home, such as the living room or office
- When adding a new integration, you can assign it to a specific area
For more advanced grouping, use the Group integration
The Group integration allows you to:
- Combine multiple entities into a single entity
- Control grouped entities as a whole
- Hide individual member entities if desired
Supported entity types for grouping include:
- Binary sensors, buttons, covers, fans, switches, locks, lights, events, media players, and notifications
To create or edit a group: Home Assistant automation
- Go to Settings > Devices & Services > Helpers
- Select the group you wish to edit or create a new one
- Add or remove entities using the “Group options” menu
For binary sensor, light, and switch groups, you can enable the “All entities” option, which inverts the group behavior. This means all members must be ‘on’ for the group to be considered ‘on’.
By effectively integrating and organizing smart devices, users can create a more efficient and user-friendly smart home experience with Home Assistant.
Building Workflows Home Assistant automation
Trigger Types Explained
Home Assistant offers a variety of trigger types to initiate automation workflows. These triggers respond to specific events or conditions in and around the home. Some common trigger types include:
Event Trigger: Fires when a specific event is received, such as Home Assistant starting up or shutting down.
- MQTT Trigger: Activates when a particular message is received on a given MQTT topic.
- Numeric State Trigger: Fires when the numeric value of an entity’s state crosses a specified threshold.
- State Trigger: Triggers when the state of given entities changes.
- Sun Trigger: Activates based on sunrise or sunset events, with optional time offsets.
- Time Trigger: Fires at a specific time each day or on a specific date.
- Zone Trigger: Activates when an entity enters or leaves a defined zone.
- Device Triggers: Encompasses events defined by integrations, such as sensor state changes or button events from remotes.
Action Options and Examples Home Assistant automation
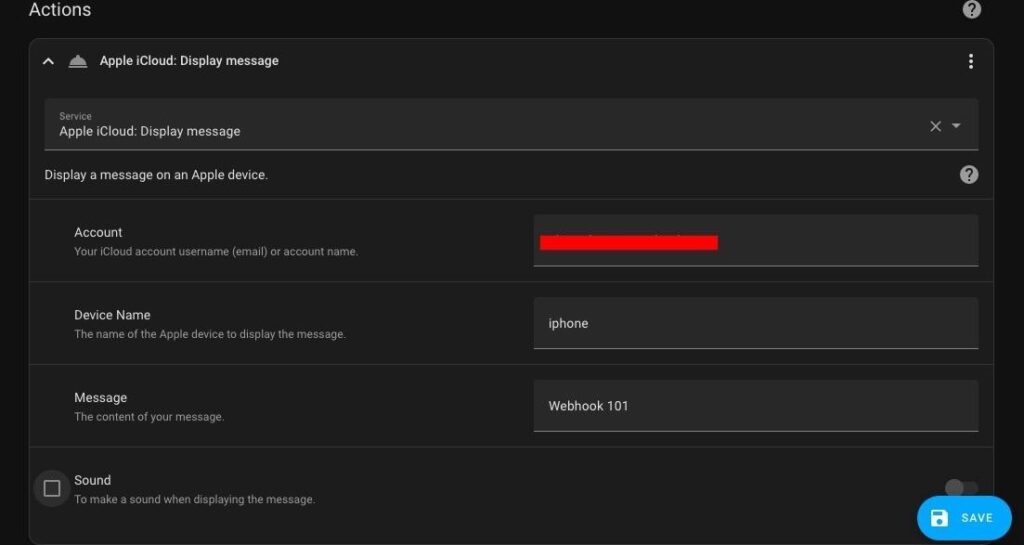
Actions define what happens when a trigger is activated. Home Assistant provides several action types:
- Turn On/Off: Use homeassistant.turn_on or homeassistant.turn_off to control entities.
- Toggle: Use homeassistant.toggle to switch an entity’s state.
- Update Entity: Request an immediate update of an entity with homeassistant.update_entity.
- Call Service: Execute specific services provided by integrations.
Example of turning on lights in the living room:
action:
– service: light.turn_on
target:
area_id: living room
Using Templates for Dynamic Values Home Assistant automation
Templates allow for more dynamic and complex automations by evaluating conditions or generating values based on the current state of entities.
- Template Triggers: Evaluate a template when recognized entities change state, firing the trigger if the result becomes ‘true’.
- Value Templates: Use templates to dynamically set values in actions or conditions.
Example of a template trigger:
trigger:
– Platform: template
value_template: “{{ is_state(‘device_tracker.paulus’, ‘home’) }}”
Templates can also be used in the for option of triggers, allowing for more complex time-based conditions.
By combining these trigger types, actions, and templates, users can create sophisticated automation workflows in Home Assistant to enhance their smart home experience.
Conclusion
Home Assistant automation is causing a revolution in the way people interact with their living spaces. This guide has provided a comprehensive overview of the essential aspects of Home Assistant, from getting started to building complex automation workflows. Home Assistant automation By exploring device integration, trigger types, and action options, users now have the tools to create a truly personalized smart home experience. The platform’s flexibility and wide-ranging compatibility make it a top choice for tech enthusiasts and homeowners alike.
To wrap up, Home Assistant’s power lies in its ability to adapt to individual needs and preferences. With the knowledge gained from this guide, users can start their journey to a more connected and efficient home. The possibilities for customization are vast, allowing for continuous improvement and adaptation as technology evolves. Home Assistant stands out as a robust solution, empowering users to take control of their smart home setup and explore new ways to enhance their daily lives through automation.
Click Here: Data Analysis Skills